Are you tired of the same old look of your shipping container? Looking for a cost-effective way to give it a much-needed makeover? Look no further.
With a fresh coat of paint, you can transform your shipping container into a stylish and eye-catching space that stands out from the rest.
Whether you’re using it as a backyard office, a trendy pop-up shop, or a stunning home, a coat of paint can work wonders in revamping its appearance.
Not only does it instantly enhance the aesthetics, but it also adds a layer of protection against the elements, ensuring your container stays in top-notch condition for years to come.
In this post, we’ll explore the different paint options available, provide handy tips for a successful container painting project, and discuss whether it’s something you can do yourself or whether you need to get the professionals in.
So, let’s dive in and get your shipping container revamp project underway.
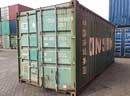
Benefits of repainting shipping containers
A shipping container is not just a functional structure; it can also be a canvas for your creativity.
Repainting your shipping container offers a multitude of benefits, both aesthetic and practical. First and foremost, a fresh coat of paint instantly enhances the appearance of your container, giving it a brand-new look.
Whether you prefer bold and vibrant colours or a sleek and minimalistic finish, paint allows you to customise your container to suit your personal style.
But the benefits of repainting go beyond aesthetics.
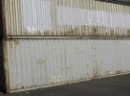
Painting your shipping container also adds a layer of protection against the elements. Shipping containers are designed to withstand harsh weather conditions, but over time, exposure to sun, rain, and salt can take a toll on their exterior. A good quality paint acts as a barrier, preventing rust and corrosion, and prolonging the lifespan of your container.
Moreover, repainting your shipping container can increase its resale value. If you plan to sell or lease your container in the future, a well-maintained and freshly painted exterior will make it more appealing to potential buyers or tenants. It shows that you have taken care of the container and adds to its overall perceived value.
Choosing the right paint for your shipping container
When it comes to choosing the right paint for your shipping container, there are a few factors to consider.
First, you need to decide between oil-based and water-based paints.
Oil-based paints are known for their durability and resistance to weathering, making them a popular choice for shipping containers. However, they require more time for drying and can emit strong fumes during application.
On the other hand, water-based paints are easier to work with, have a faster drying time, and are more environmentally friendly.
Next, consider the finish of the paint.
Flat or matte finishes are great for hiding imperfections and giving your container a modern and sleek look.
Satin or semi-gloss finishes offer a bit of shine and are easier to clean, making them suitable for containers used in high-traffic areas. Ultimately, the choice of finish depends on your personal preference and the purpose of your container.
It’s also crucial to select a paint colour that complements your surroundings and serves your specific needs.
If you’re using the container as a backyard office or a pop-up shop, you may want to choose colours that align with your brand or create a welcoming atmosphere.
On the other hand, if you’re converting the container into a home, you can explore a wider range of colours and experiment with different combinations to create a truly unique living space.
If you head on over to our sister site at NZBOX, you will discover more about the right types of paint for shipping containers as well as find out more about primers and thinners.
Preparing the shipping container for painting
Before you start painting your shipping container, proper preparation is key to achieving a smooth and long-lasting finish. Here are the steps to follow:
- Clean the surface: Begin by thoroughly cleaning the container with a high-pressure washer to remove dirt, dust, and any loose paint. Pay extra attention to areas with rust or corrosion, as they may require additional treatment.
- Repair and prime: Inspect the container for any damages or dents. Use a filler or putty to repair any imperfections and sand the surface to create a smooth texture. Apply a coat of primer to ensure better adhesion and to create a uniform base for the paint.
- Masking and taping: If there are any parts of the container that you don’t want to be painted, such as windows or handles, use masking tape and plastic sheets to protect them from overspray.
- Choose the right tools: Select high-quality brushes, rollers, or spray guns depending on the size of your container and the type of paint you’re using. Good tools make a significant difference in achieving a professional-looking finish.
A step-by-step guide to painting your shipping container
Now that your container is properly prepared, it’s time to start painting. Follow these steps for a successful container painting project:
- Start with the roof: Begin by painting the roof of the container. Use long, even strokes and make sure to cover the entire surface. If you’re using a roller, consider using an extension pole for hard-to-reach areas.
- Paint the sides: Once the roof is dry, move on to the sides. Start from the top and work your way down, using vertical or horizontal strokes, depending on your preference. Take your time to ensure even coverage and avoid drips.
- Apply multiple coats: Depending on the colour and type of paint you’re using, you may need multiple coats for a vibrant and uniform finish. Allow each coat to dry completely before applying the next one and follow the directions on your chosen paint can.
- Finishing touches: After the main surfaces are painted, focus on smaller details such as doors, windows, or trim. Use a smaller brush or a foam roller for precise application.
- Clean up: Once you’ve finished painting, clean your tools according to the manufacturer’s instructions. Proper cleaning and storage of your painting equipment will ensure their longevity and make future projects easier.
Whilst it can be daunting to paint your shipping container, with the right tools, the right preparation, and the right paint, it’s a job that can be done yourself. Of course, if you are dealing with bigger shipping containers such as 20ft or 40ft containers, you may benefit from getting in the professionals as they are likely to get the job done in a more timely manner. You can read more about using professionals below.
Tips for achieving a professional-looking finish
Whilst you can hire professionals (see below), you can also achieve a professional-looking finish for your shipping container by painting it yourself. Here are some additional tips to keep in mind:
- Choose high-quality paint: Invest in a good quality paint that is specifically formulated for exterior use. Quality paints adhere better, provide better coverage, and offer longer-lasting results. If you check out the shipping container paints on the NZBOX site, you will also see that there are specific paints for the interior and exterior of shipping containers.
- Consider primer and sealer: Applying a primer before painting can improve adhesion and help the paint adhere better to the surface. Additionally, using a sealer after painting can provide an extra layer of protection and enhance the durability of the finish. Both primers and sealers will add to the overall finishing look of the paint as well, adding to the professional look.
- Follow proper painting techniques: Use proper painting techniques such as applying thin and even coats, allowing sufficient drying time between coats, and avoiding overbrushing or over-spraying. This will help you achieve a smooth and professional finish. Allow plenty of time to apply multiple coats for added protection and ensure the surface is prepared before you make the first stroke with your brush or roller.
- Protect yourself and the environment: When painting, make sure to wear protective gear such as gloves, goggles, and a mask to protect yourself from fumes and chemicals. Consider using eco-friendly paints that have low VOC (volatile organic compound) content to minimise the impact on the environment.
- Don’t forget about maintenance: While a fresh coat of paint can significantly enhance the appearance of your shipping container, regular maintenance is essential to ensure its longevity. Inspect the painted surfaces periodically, touch up any areas that show signs of wear or damage, and clean the container regularly to remove dirt and debris. You can read more about maintenance and care for your shipping container below.
Maintenance and care for painted shipping containers
To keep your painted shipping container looking its best, whether you have just applied a fresh coat of paint or you have purchased or hired a brand new shipping container for the first time, here are some maintenance and care tips to follow:
- Clean regularly: Wash the container with a mild detergent and water solution at least once every few months. This will remove dirt, dust, and other pollutants that can accumulate on the painted surface.
- Inspect for damage: Regularly inspect the painted surfaces for any signs of damage, such as chips, cracks, or peeling. Promptly repair and touch up these areas to prevent further deterioration.
- Protect from harsh weather: If your container is exposed to extreme weather conditions, consider adding an additional layer of protection, such as a clear coat or a weather-resistant sealant, to prolong the life of the paint.
- Avoid harsh chemicals: When cleaning your container, avoid using harsh chemicals or abrasive cleaners that can damage the paint. Stick to mild detergents and soft cloths or brushes.
By following these maintenance practices, you can ensure that your painted shipping container remains in top-notch condition for many years to come.
Hiring professionals for shipping container painting
While painting a shipping container can be a rewarding DIY project, it may not be feasible or practical for everyone. If you lack the time, expertise, or resources to tackle the painting process yourself, hiring professionals can be a great option.
Professional painters who specialise in shipping container painting have the experience, knowledge, and tools to deliver exceptional results.
They can guide you in choosing the right paint, handle the preparation and painting process efficiently, and ensure a flawless finish.
Additionally, hiring professionals saves you time and effort, allowing you to focus on other aspects of your shipping container project.
Professionals are often a good choice for larger shipping containers whereas smaller containers are less daunting to tackle as a DIY project.
Whichever way to decide to paint your shipping container, the tips above will hopefully deliver a professional-looking finish.
Summary
A shipping container makeover is within reach, thanks to the transformative power of a fresh coat of paint. Whether you’re looking to revamp your container as a backyard office, a trendy pop-up shop, or a stunning home, painting it can instantly enhance its aesthetics and add a layer of protection against the elements.
Remember to choose the right paint that suits your needs, properly prepare the container, and follow the step-by-step guide for a successful painting project. Take the time to achieve a professional-looking finish, and don’t forget to maintain and care for your painted container to ensure its longevity.
So, why settle for a dull and uninspiring shipping container when you can revamp it with a fresh coat of paint? Let your creativity soar, and embark on the journey to a stunning shipping container transformation today.